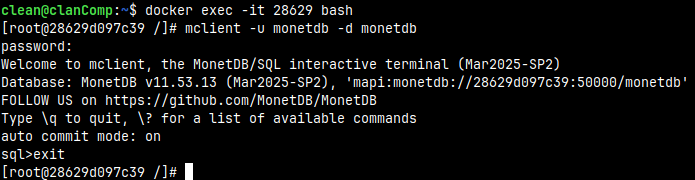
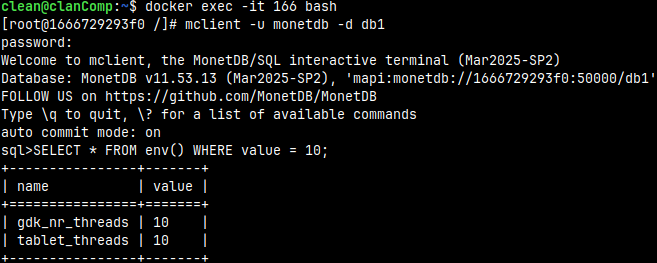
Mclient is the MonetDB command line client that connects to the MonetDB server to execute SQL commands. We have used this client in all the previous videos, but now we will see how we can make better use of it.
General Information
With mclient we can find out the version of our server and we can get help for mclient commands.
This will show us version: mclient -v
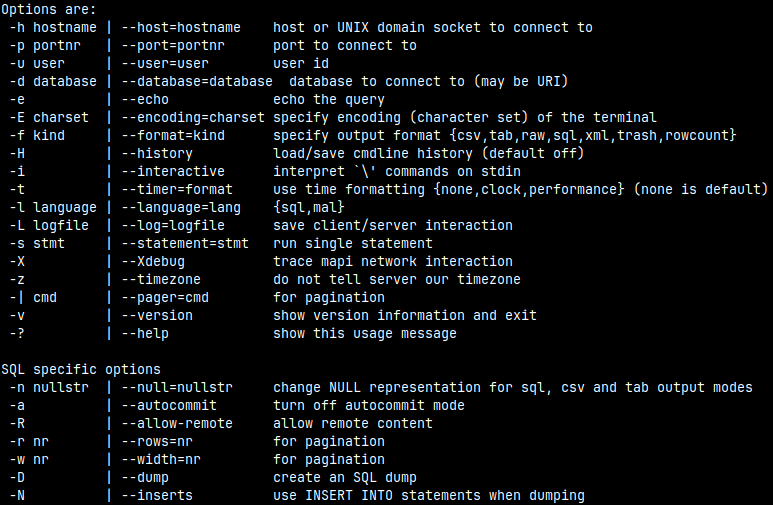
This is how we can get help: mclient -?
Information About Our Database
In one of the previous blogposts "link", I created database farm "DBfarm". Inside of it we have a database "DBfarmDB". I will now login to that database as an admin and I will create some database objects. The objects will be created in the "sys" schema. monetdbd start /home/fffovde/Desktop/DBfarm monetdb set readonly=no DBfarmDB#if it is still readonly mclient -u monetdb -d DBfarmDB #password monetdb
CREATE TABLE tablo( Number INT ); CREATE VIEW viewo( Number ) AS SELECT Number from tablo; CREATE SEQUENCE seqo;
CREATE FUNCTION funco() RETURNS INTEGER RETURN SELECT 2;
CREATE SCHEMA schemo;
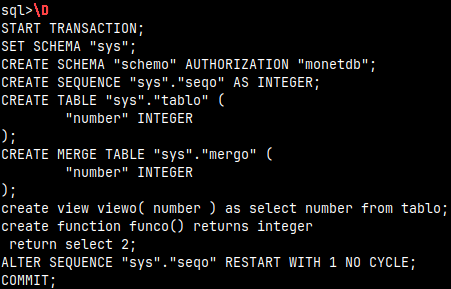
If we just type "\D" inside of the mclient, we will get sql dump in the stdout, for the whole database.
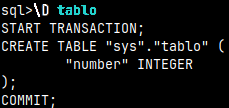
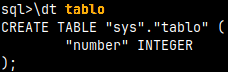
We can type the table name after the "\D" command. This will give us SQL to create that table. \D tablo
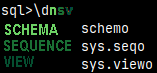
If we want to get a list of selected database objects, we just need to list them after the "\d" command. I will list schemas, sequences and views.
\dnsv
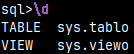
We can get lists of these objects: n – schemas f – functions s – sequences t – tables v – views Just "\d" will give as tables and views by default. It is the same as "\dvt".
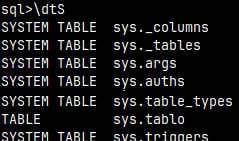
We can combine "\d" command with the letter "S". That will add system objects to lists. \dSt
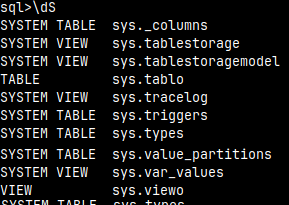
"\dS" is equal to "\dSvt".
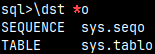
We can get SQL dump only for objects with the specific name. \dst tablo Name should be written with the lower letters, or inside of double quotes, like "Tablo".
We can use wildcards "*" (several letters) and "_" (one letter). \dst *o Wildcards can not be used inside of double quotes. This will not work: \dst "*o"
Query Execution Control
Query Formatting
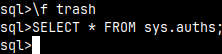
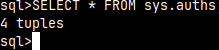
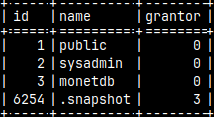
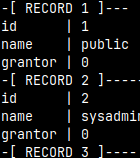
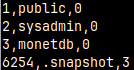
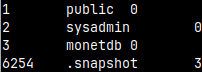
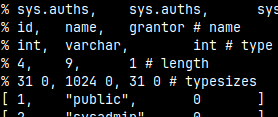
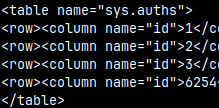
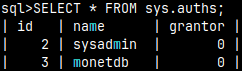
We can control how the result of a query will be presented ( default is "sql" ). Let's run "SELECT * FROM sys.auths;" with different modes.
If we don't want to see the result of a query, we can use "trash" and "rowcount" modes.
\f trash --trash will return nothing
\f rowcount -- only row count will return
\f sql --default
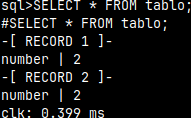
\f expanded -- records are vertical
\f csv -- comma isseparator
\f tab -- tab is separator
\f raw --raw database format
\f xml --like xml document
There are some special modes for the CSV.
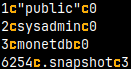
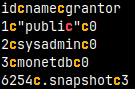
\f csv=c --separator is letter "c", or any other sign
\f csv+c --header is included
<= Note that there are double quotes around the word "public".
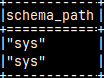
For the rest =>, we will use query: SELECTschema_path FROM sys.users;
\f csv --quotes are doubled
\f csv-noquote --no doubling
\f sql --default
The Number of Rows
When we run query that will return a lot or rows, we will not be able to see all of them. They will just whiz by before our eyes. We want to control how the rows are displayed. We want to see them page by page. For that we will use "\r" command.
For this example, I will use system table sys.function_types. It has 7 rows.
SELECT * FROM sys.function_types;
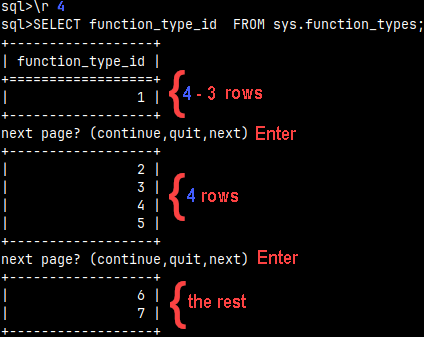
I will set rows command to four: \r 4
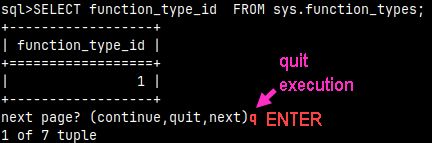
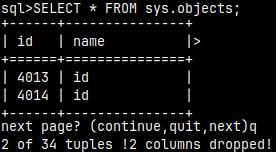
We will get only one row for the first page. For the first page we always get N-3 rows. This is probably bug. If N is three or smaller, then the first page will be empty. For other pages we will get the complete 4 rows. We can jump to the next page with "Enter". That is the same as "next".
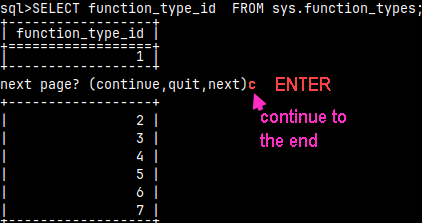
If we type the letter "c" and then we press ENTER, we will jump to the end of a table.
If we type the letter "q" and then we press ENTER, we will immediately exit the execution.
For the last example I will make terminal window small.
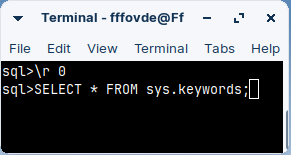
I will set command to zero: \r 0 I will query this table. SELECT * FROM sys.keywords;
This is the best mode, because now the page is the size of the window.
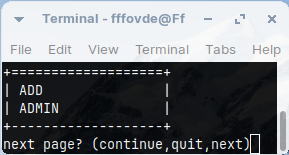
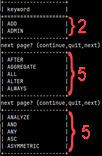
I will press ENTER several times to go through a few pages. Then I will enlarge the window.
Only the first page will have 2 rows that are visible in one window. Other pages will have five rows. Obviously we have some "offset by 3" bug.
We will exit paging mode by setting the command to minus one "\r -1".
Width of a Table
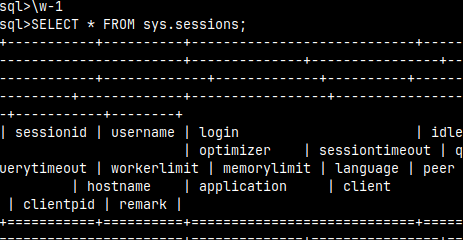
If we set "\w" to minus one, MonetDB will think that we have unlimited width terminal. I've narrowed the window, so presentation will be squeezed and crumbly. It becomes better if window is wider.
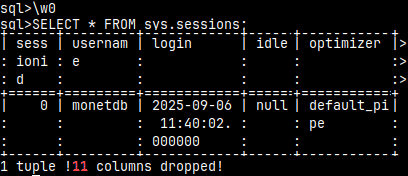
Default value of the "\w" command is zero. I made my terminal window narrow, so in this mode 11/16 columns will not be shown. Only the width of the terminal is used.
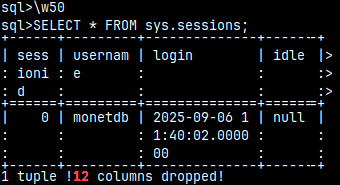
If we set "\w" to some positive number, MonetDB will think that the terminal is only a certain number of characters wide. I'll set it to 50 characters, which is enough for 4 columns.
Auto Commit Mode
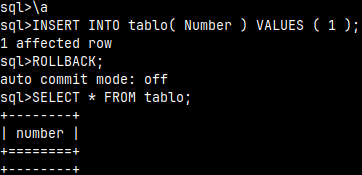
By default, auto commit mode is turned ON in mclient. We can turn it OFF with the command "\a".
We turn it back to ON with "\A".
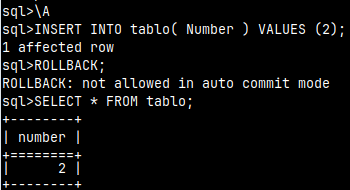
\a INSERT INTO tablo( Number ) VALUES ( 1 ); ROLLBACK; SELECT * FROM tablo; --nothing was auto commited
\A INSERT INTO tablo( Number ) VALUES ( 2 ); ROLLBACK; --not allowed in auto commit mode SELECT * FROM tablo; --value 2 is auto commited
Logging and Monitoring
I will leave the session and then I will log in, just to clear the history. quit mclient -u monetdb -d DBfarmDB --password monetdb
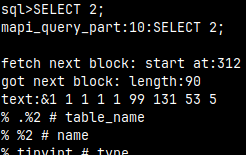
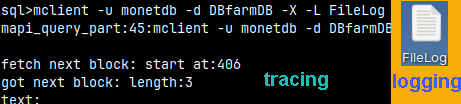
I will turn on logging and tracing on mclient. This is mostly useful for debugging. \L /home/fffovde/Desktop/FileLog --log to this file \X --trace everything that mclient is executing
I will now execute a query:
SELECT 2;
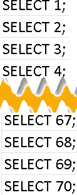
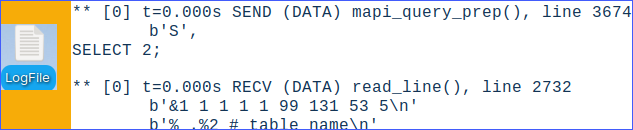
This is tracing. We'll get a lot of lines.
A new "LogFile" will appear with the similar content. This is logging.
We can disable logging and tracing. \L --we use \L without giving a full path \X false
I will run a few more queries: SELECT 3; SELECT 4;
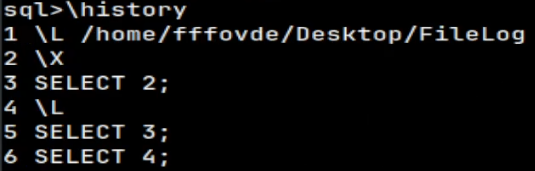
Using the "\history" command, we can list all the SQL and commands we run in this session.
I will again quit the session, and log again, so I can change current directory.
quit cd /home/fffovde/Desktop mclient -u monetdb -d DBfarmDB --password monetdb
SQL Input and Output
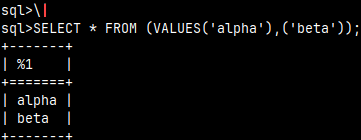
We can redirect the result of our statement to some shell command. \| grep "alpha" SELECT * FROM (VALUES('alpha'),('beta'));
I will disable this command like this. Now our result is normal. \| --without shell command SELECT * FROM (VALUES('alpha'),('beta'));
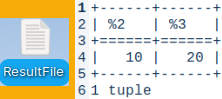
We can redirect the result of our statement to a file. \>ResultFile SELECT 10, 20;
Every statement we run will now go to the file, and not to the terminal. The file is in the current directory. We can disable the effect of this command with: \>--without the name of a file
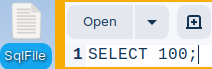
On the Desktop, I will create one textual file with one query inside of it.
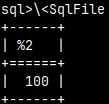
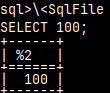
I can call this query from the file. I'll type: \<SqlFile
This is usefull when we want to run some prepared SQL script. The problem is that we will get the result, but we will not know what statement caused that result. To solve this we will use echo "\e".
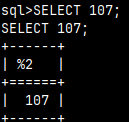
After we turn on echo, every statement will be shown before the result of the statement. Useless for SQL but great for files.
SELECT 107;
\<SqlFile
I will again quit, and then login back, to disable effect of the echo command. quit mclient -u monetdb -d DBfarmDB --password monetdb
Other Backslash Commands
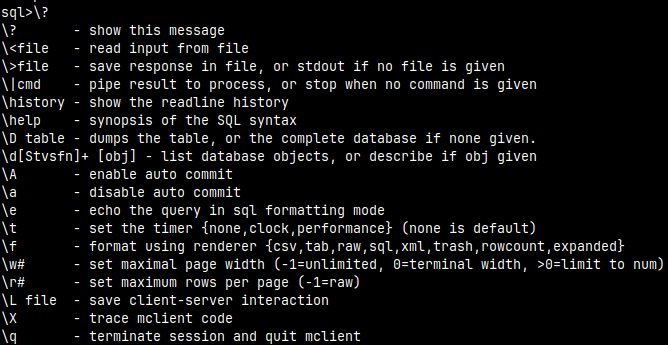
"\?" will give a list of all of the backslash commands.
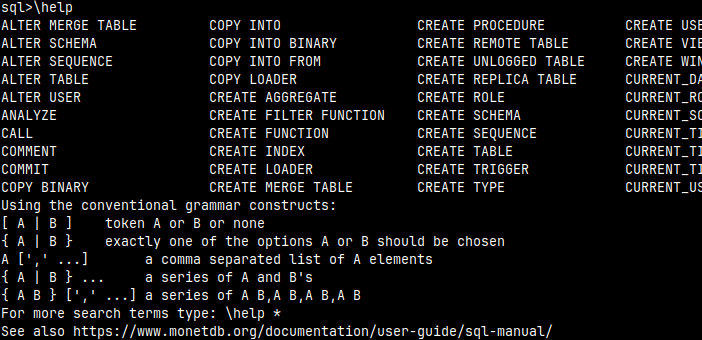
"\help" will give a list of SQL statements.
We already saw how to use timing in this blog post "link". It is also possible to turn on timing inside of the mclient. Options are "none, clock, performance".
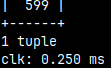
\t clock SELECT 599;
\t performance SELECT 599;
--statements-- sql = parsing opt = optimizing run = running clk = total time
\t will return the current mode.
\tnone To disable timing.
We can always exit mclient with the "\q", or "quit".
Dash Commands
When we log in to mclient, we can provide an IP address, port number, username and database name. There are many more of these arguments
Many commands exist in both backslash and dash version. I will give you example of such commands here. During this example I will alternately login and quit, because dash commands can be run only during the login.
This will create sql dump of the whole database.
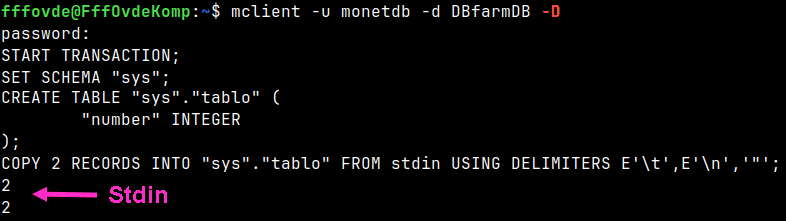
mclient -u monetdb -d DBfarmDB -D
This is the same as "\D" backslash command, that we saw earlier.
We can enable tracing and logging.
mclient -u monetdb -d DBfarmDB -X -L FileLog
The same as "\X" and "\L".
We will set that our queries return expanded format, we will turn on echo and the timing. mclient -u monetdb -d DBfarmDB -f expanded -t clock -e
Format and Time support all of the possible modes.
The same as "\f, \t, \e".
With "-a" switch we can turn off autocommit for the whole session: "mclient -u monetdb -d DBfarmDB -a".
When we run a query, it will be paged to 5 rows, and the visible width will be 50 characters. mclient -u monetdb -d DBfarmDB -r 5 -w 50
We already saw this with commands "\r, \w".
We can apply shell command on all of our queries. Notice that pipe must be escaped. mclient -u monetdb -d DBfarmDB -\| 'grep m'
The same as \| grep "m".
History, Null and Timezone
I will login again with some new options: mclient -u monetdb -d DBfarmDB -z -n "zero" -H
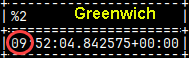
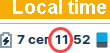
Option "-z" is for disabling the time zone. Statement: SELECT CURRENT_TIME; , will give me Greenwich time, not my local time.
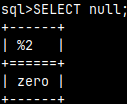
Option "-n" will define how the null will be presented in the terminal. This is only valid when "-f" format is either "sql,csv, tab or expanded".
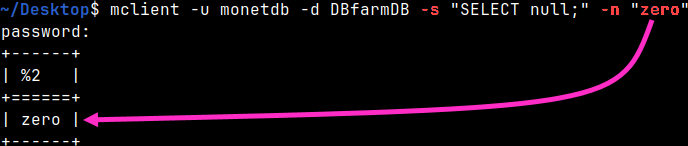
Default format is "sql", we have set nul to be "zero", so the null will be presented as a "zero". SELECT null; --result is "zero"
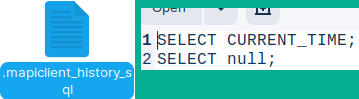
In this session we have run two statements: --SELECT CURRENT_TIME; --SELECT null;
Because our session was started with the switch history "-H" both of these statements are recorded in the file: /home/fffovde/.mapiclient_history_sql
I will now quit this session, and then I will login again: quit mclient -u monetdb -d DBfarmDB -H
Because I have used "-H" switch, history of mclient statements will be available for me. By pressing keyboard arrows, I will list that history.
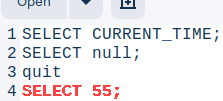
If I run one more statement, that statement will be added to "/.mapiclient_history_sql" file. So, when "-H" switch is active, new statements will be added to history file, and that history will be available to us. SELECT 55; We can delete the history by deleting directly from the ".mapiclient_history_sql" file.
Getting Data from URLs
I will create a new table and then I will try to get data from the internet to insert into that table. Mclient will refuse to do that. CREATE TABLE IndustryList( Industry VARCHAR(50) ); COPY INTO IndustryList FROM 'https://cdn.wsform.com/wp-content/uploads/2020/06/industry.csv' ON CLIENT;
I will quit the session, and then I will login with a remote "-R" switch. quit mclient -u monetdb -d DBfarmDB -R--password monetdb COPY INTO IndustryList FROM 'https://cdn.wsform.com/wp-content/uploads/2020/06/industry.csv' ON CLIENT;
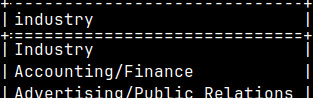
It will work now. I can read from "IndustryList" table. SELECT * FROM IndustryList;
SQL Dump with Insert Into
Normal dump will create a script that will fill a table with the data from the Stdin. It will use "COPY INTO FROM stdin" statement. mclient -u monetdb -d DBfarmDB -D
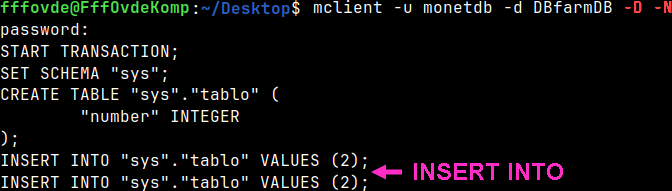
If we want to get "INSERT INTO" statements, then we have to add switch "-N". mclient -u monetdb -d DBfarmDB -D -N
Running SQL Statements from the Shell
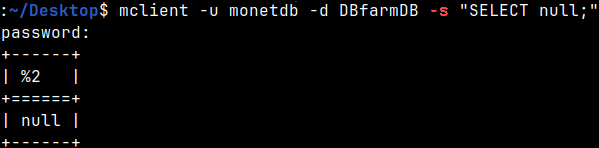
With "-s" switch we can run a statement, instead of logging in. mclient -u monetdb -d DBfarmDB -s "SELECT null;"
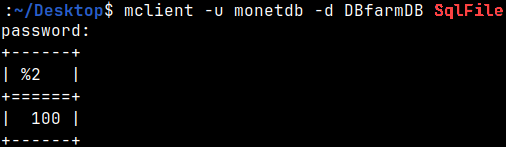
We can also run a script directly from the shell. We previously created this file. mclient -u monetdb -d DBfarmDB SqlFile
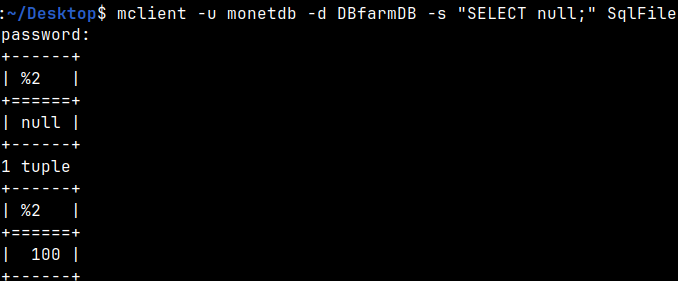
We can use them both: mclient -u monetdb -d DBfarmDB -s "SELECT null;" SqlFile
Many of the previously shown options will work with the shell query, too. mclient -u monetdb -d DBfarmDB -s "SELECT null;" -n "zero"
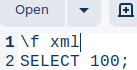
I will add command "\f xml" in the SqlFile.
This will make our command to fail. mclient -u monetdb -d DBfarmDB SqlFile
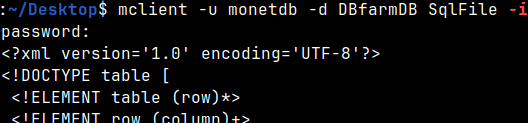
We will add interactive switch "-i". It will work now. mclient -u monetdb -d DBfarmDB SqlFile -i
DOTMONETDBFILE
We already talked about DOTMONETDBFILE environment variable, in the blog post about backup "link". All of that is valid for the mclient, too.
While Monetdbd is a tool that works with DBfarm, Monetdb is a tool that works with the database. Monetdb can be used to create, lock, release, start, stop, and destroy databases. In reality, Monetdb will just delegate all the work to Monetdbd, and Monetdbd will be the one that will perform all the operations.
Before we learn something about Monetdb, we first have to start DBfarm. We have created DBfarm in the previous post, about monetdbd, "link". Inside of this farm we already have database DBfarmDB.
monetdbd start /home/fffovde/Desktop/DBfarm
Database Commands
I will create new database in DBfarm.
monetdb create dbA
Database will be created in the maintenance mode.
Database that is in the maintenance mode can only be started on localhost with this command: monetdb start dbA
I will login to this database and I will create a new user: mclient -u monetdb -d dbA #password monetb
CREATE USER "userA" WITH PASSWORD '123' NAME 'Geriel Damdin';
I will quit the session, and then I will login as a newly created user.
quit #session mclient -u userA -d dbA
While the database is in the maintenance mode, only admin can login to it.
I will now release the database. That will pull database out of the maintenance mode. monetdb release dbA mclient -u userA -d dbA #user will now be able to login
Currently database is out of the maintenance mode. How can we place our database to maintenance mode again? For that we just have to lock the database.
quit #session monetdb lock dbA monetdb stop dbA
If database is locked, then only the administrator will be able to work with it.
Sample Databases
For further examples, I will create three more databases. monetdb create dbBdbCdbD
I will then get them out of the maintenance mode. monetdb -q release dbBdbCdbD
Most of the commands can work on severaldatabases at once. We just have to name all of the databases in a row.
Notice that after the release command we didn't get any confirmation message. That is because we have used "--quiet" option. This option will always suppress confirmation messages. It will not suppress error messages, for example if we run it again. =>
Database Status
I will show you how to get status of a databases. I will change the status of the dbA and dbB for this example.
monetdb start dbA monetdb lock dbB
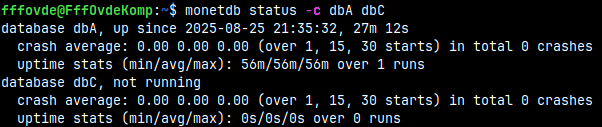
monetdb status If we type the status command, we will get some information about DBfarm databases. Database dbA is "LR" – locked and running for 1 minute. This database never crashed, so its health is 100%. On average, database dbA was running for 56 minutes.
In the state column we can see that our database can be in one of these states. We can also see for how long is database in that state.
B – booting
R – running.
S – stopped.
C – crashed.
LS – locked and stopped.
LR – locked and running.
In the health column we can see ratio "( successful starts/stops ) / ( all starts/stops )". 100% means that we never had unsuccessful start/stop.
In the health column we can see the times (56 min and 24 min). This is the average time the database has been up and running.
monetdb status -c dbA dbC
We can specify a database name (or several database names) to get the status for only them.
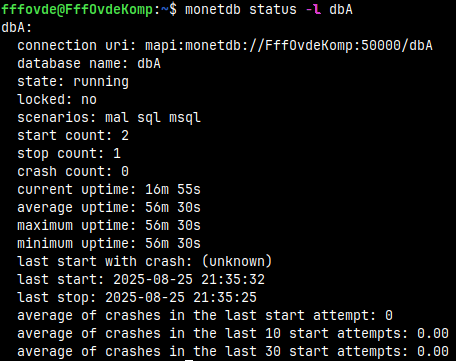
monetdb status -l dbA
If we use options "-c" and "-l" with the status command, we would get several more pieces of information for our databases.
monetdb status -s rl With the "-s" option we can limit the displayed databases to only those that are running and/or locked ("rl"). The options are b (booting), r (running), s (stopped), c (crashed), l (locked).
Monetdb Information
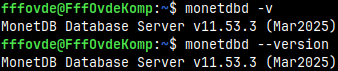
Option "-v" will return the version of a server. monetdb -v
We can also use the long syntax. monetdb --version
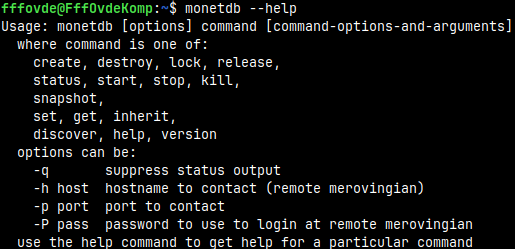
This is how we can get help. We can only use long syntax for help. monetdb --help
Snapshots
Snapshot to Stdout
This command would write snapshot of a database to stdout. monetdb release dbA #first we have to release dbA monetdb snapshot write dbA
Our stdout is terminal, so we can not send binary data to stdout.
We can redirect stdout to a file. That way we can use "write" to get snapshot. monetdb snapshot write dbA > /home/fffovde/Desktop/dbA.tar
Snapshot to File
We can not create a snapshot in a file if property "snapshotdir" is not set. We do it with monetdbd. monetdbd set snapshotdir=/home/fffovde/Desktop /home/fffovde/Desktop/DBfarm
For "snapshot create" we have to provide full path, and that location must be inside of the "snapshotdir". I will try to backup database dbA. monetdb snapshot create -t /home/fffovde/dbAsnap dbA
I will try with this full path, that is inside of the "snapshotdir". This will work. monetdb snapshot create -t /home/fffovde/Desktop/ZZZ/dbAsnap dbA
With "-t" option we can create a snapshot file of one database, with the custom name. Folder "ZZZ" must be made in advance.
Without "-t" option, snapshot will be created with default settings. monetdb snapshot create dbB
We can not snapshot "tbB" because it is locked.
After we release the file, we will create the snapshot. monetdb release dbB monetdb snapshot create dbB
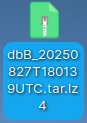
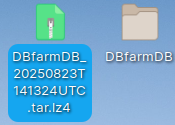
dbB_20250827T180139UTC.tar.lz4
Default name is made of the database name and the timestamp.
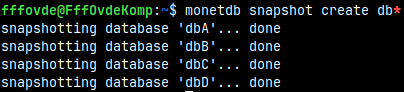
We can use wildcards for the name of a database. In this way we can create snapshots of several databases at once.
monetdb snapshot create db*
Restore a Snapshot
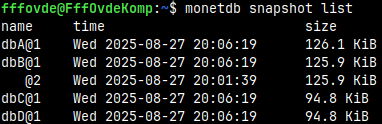
monetdb snapshot list
This is how we can get a list of all of the possible snapshots. For database dbB, we have two snapshots. Only default named snapshots are listed. Snapshot "dbAsnap" is missing because it has custom name.
We can restore second snapshot of the "dbB".
monetdb snapshot restore dbB@2
We can restore database under some other name.
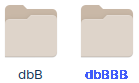
monetdb snapshot restore dbB@2 dbBBB
Inside of the "DBfarm" we now have this database twice.
We can also reference snapshot by its full path. monetdb snapshot restore -f /home/fffovde/Desktop/dbD_20250827T180619UTC.tar.lz4 dbD
In this case, we have to provide under which name we are restoring.
Thanks to "-f" switch, we don't have to confirm overwrite of the existing database.
Delete a Snapshot
This is how we can delete some snapshot. monetdb snapshot destroy dbD@1
We can delete all but the last N snapshots for some database. monetdb snapshot destroy -f-r 1 dbB
Monetdb will delete the oldest dbB snapshot. We stil have one snapshot more.
We can apply this command with the wild card, on all of the matched databases. I will leave zero snapshots, so we will delete them all. monetdb snapshot destroy -f -r 0 db*
We have no more snapshots that have default name. monetdb snapshot list
Database Settings
Read Database Settings
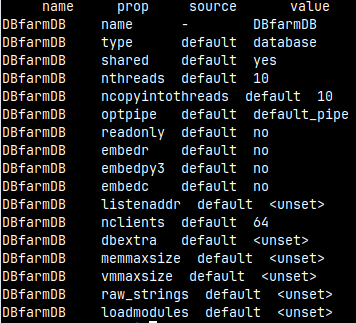
This is how we can read properties of some database. monetdb get all DBfarmDB We can select what property we want to see: monetdb get optpipe DBfarmDB
For each property, we will see its name, value, and whether that value is the default value.
name prop source value DBfarmDB name - DBfarmDB DBfarmDB type default database DBfarmDB shared default yes DBfarmDB nthreads default 10 DBfarmDB ncopyintothreads default 10 DBfarmDB optpipe default default_pipe DBfarmDB readonly default no DBfarmDB embedr default no DBfarmDB embedpy3 default no DBfarmDB embedc default no DBfarmDB listenaddr default <unset> DBfarmDB nclients default 64 DBfarmDB dbextra default <unset> DBfarmDB memmaxsize default <unset> DBfarmDB vmmaxsize default <unset> DBfarmDB raw_strings default <unset> DBfarmDB loadmodules default <unset>
Database Performance Settings
For most of the settings above, before we change them, we have to stop our database. Database "DBfarmDB" is currently stopped.
monetdb set nthreads=4 DBfarmDB monetdb set ncopyintothreads=6 DBfarmDB monetdb set optpipe=default_pipe DBfarmDB
Number of threads that database will use. By default, it is equal to number od CPU cores. Number of threads used for COPY INTO FROM. Default is equal to number of columns copied. We can find the list of possible optimizers in the system table "sys.optimizers".
After we change some property, the column "source" will be "local", instead of the "default". monetdb get nthreads DBfarmDB
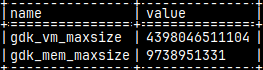
I will now login to this DBfarmDB database. mclient -u monetdb -d DBfarmDB I will run this statement: select * from env() where name in ('gdk_mem_maxsize','gdk_vm_maxsize');
This is where we can see current values for properties "memmaxsize" and "vmmaxsize".
These values are in bytes, so maximal virtual memory size is about 4.000 terabytes, and maximal memory size is about 10.000 gigabytes. I will now exit and I will stop the database. quit monetdb stop DBfarmDB
#monetdb set memmaxsize=107374182400 DBfarmDB
This would limit RAM consumption of this database to 100GB. This is not hard limit; it is just suggestion to memory allocator.
#monetdb set vmmaxsize=107374182400 DBfarmDB
This is hard limit. Limiting virtual memory will limit how much RAM+Swap space this database can use.
Restriction Settings
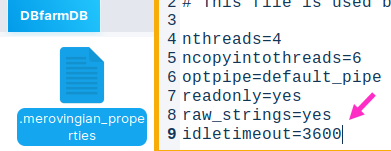
monetdb set readonly=yes DBfarmDB monetdb set nclients=10 DBfarmDB monetdb set idletimeout=3600 DBfarmDB
We can set our database to be read only. We can limit number of the clients that can connect to our database. Connection will be closed if idle for this many seconds.
This property "idletimeout" is not listed when we use "get all" command, but inside of the file "DBfarmDB > .merovingian_properties" , that property is listed. It is also in documentation.
Extension Settings
#monetdb set embedpy3=true DBfarmDB #monetdb set embedr=true DBfarmDB #monetdb set embedc=true DBfarmDB
If we want to make UDF functions in python or "C" or "R" language, we have to set these settings to TRUE for specific database. We used this for python in the blog post "link". For values we can use true/false or yes/no.
In this blog post "link", we have installed library "monetdb-odbc-loader". For such libraries to work in a database, we have to load them. This is done with "loadmodules" property.
#monetdb set loadmodules=odbc_loader DBfarmDB
Discovery Setting
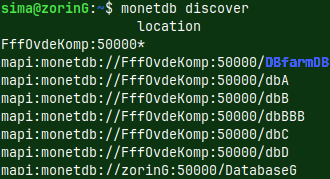
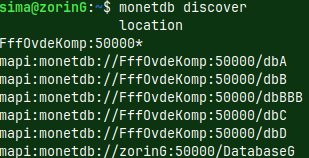
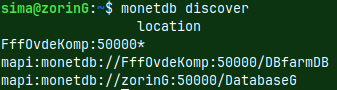
I will now open green server. We have created that server in this blog post "link". monetdbd start /home/sima/monetdb/DBfarmG#I will start daemon In the previous blog post "link", about monetdbd, we turned on discovery on the voc server for "DBfarm". I will again use discover command on the green server. monetdb discover
Discover command will show us all of the databases on the "voc" server, that are inside of the "DBfarm", and one local database on the green server.
We have turned on discovery for the whole "DBfarm" and for that we have used monetdbd. Now, I want to hide only one of those databases from discovery. I will hide database "DBfarmDB". monetdb set shared=no DBfarmDB
Discovery for "DBfarmDB" is turned off. Discover command will show us other databases from the "DBfarm", but not "DBfarmDB".
Other Settings
I will skip settings "type, dbextra, listenaddr". I don't understand them. I will talk about "raw_strings" setting.
I will login into DBfarmDB with the default password: mclient -u monetdb -d DBfarmDB
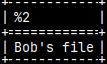
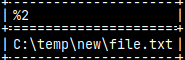
By default, the raw strings are turned OFF. I have talked about raw strings in this blog post "link". I will run some queries to see the default behaviour.
SELECT 'Bob\'s file';
SELECT 'a\nb';
SELECT 'C:\\temp\\new\\file.txt';
I will exit the session, and I will stop the database. quit monetdb stop DBfarmDB
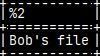
I will change "raw_strings" property. monetdb set raw_strings=true DBfarmDB#false is default Then, we will again login, and run those queries from above.
SELECT 'Bob''s file'; Backslash will not work.
SELECT 'a\nb';
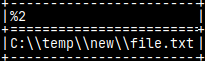
SELECT 'C:\\temp\\new\\file.txt';
Off course, we can get the same results as before if we place prefix "E" in front of the strings. That will make them NOT raw.
I will quit session and stop the database.
quit monetdb stop DBfarmDB
Set Property to Default
Currently database can connect to the most 10 clients. We can change that back to the default value (64). monetdb get nclients DBfarmDB
monetdb inherit nclients DBfarmDB
For some properties we can unset them: monetdb set loadmodules= DBfarmDB
Something More About Database Commands
We can provide password for monetdb user during database creation. monetdb create -p password123 dbE
This database will not be created in the maintenance mode. It has non-standard password, so there is no need for that. We can start it directly.
monetdb start dbE
Now, that our database is running, we can stop it with the "stop" command. This command will send SIGTERM signal, so it will kindly ask database to close, although the database can refuse that. Instead of the "stop" command, it is possible to us "kill" command. This command will send SIGKILL signal and the database will be violently killed.
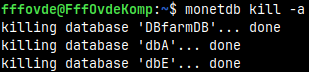
I can kill "dbE" database by its name "monetdb kill dbE", or I can use "-a" switch to kill all of the open databases. monetdb kill -a
"-a" switch can be used with the commands "lock, release, start, stop and kill".
I will now delete this dbE database: monetdb destroy dbE
Remote Control
Remote control is explained in the blog post about monetdbd, "link". Take a look there to find out about switches "-h,-p,-P".
Monetdbd is a MonetDB management daemon. We use it to: – Initialize a directory as a DBfarm. A DBfarm is a folder that can contain several MonetDB databases. – Monetdbd is used to set and read farm-wide daemon options that are shared between databases. – Monetdbd is used to start/stop the actual servers (Mserver5 process). – Users usually connect to the monetdbd daemon first, and then this daemon will redirect them to the selected database.
Monetdbd Informations
monetdbd -v monetdbd --version
This is how we can find version of the monetdbd daemon. We can use short or long command syntax.
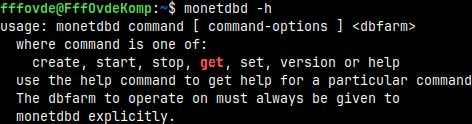
This is how we can get help for monetdbd. monetdbd -h monetdbd --help
We can provide the name of a command after the "-h" option. That will give us help for that command.
Monetdbd and DBfarm
cd /home/fffovde/Desktop mkdir DBfarm monetdbd create DBfarm
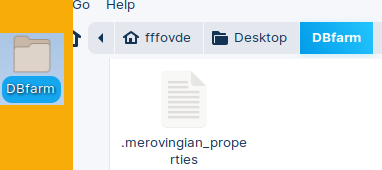
We will create a folder with the name "DBfarm". With the command "monetdbd create", we will initialize this folder. Inside of it, a new file ".merovingian_properties" will appear. Now it is possible to create new databases inside of this folder.
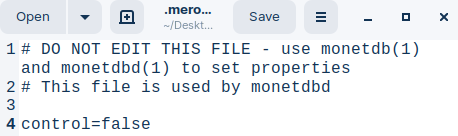
This is the inside of the ".merovingian_properties" file.
Currently no one is listening to default MonetDB port 50.000. I will make DBfarm directory functional.
monetdbd start DBfarm
Now our daemon is listening to port 50000, and DBfarm is functional. ss -tlnp | grep 50000
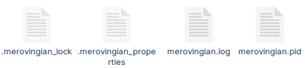
After the first start of the DBfarm, three new files will appear in the DBfarm directory. ".merovingian_lock" file is empty.
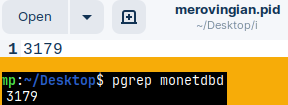
"merovingian.pid" file has process ID for monetdbd process. We can confirm that with "pgrep monetdbd".
"merovingian.log" file is a file with a log.
We can stop DBfarm with monetdbd. monetdbd stop DBfarm
After closing the farm, file "merovingian.pid" will disappear. This file exists only when DBfarm is functional. Now, again, no one is listening to port 50.000. ss -tlnp | grep 50000
Getting and Setting DBfarm Settings
We can read setttings of the DBFarm.
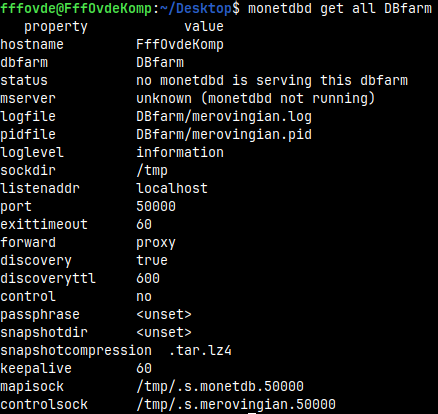
monetdbd get all DBfarm
hostname FffOvdeKomp dbfarm DBfarm status no monetdbd is serving this dbfarm mserver unknown (monetdbd not running) logfile DBfarm/merovingian.log pidfile DBfarm/Merovingian.pid loglevel information sockdir /tmp listenaddr localhost port 50000 exittimeout 60 forward proxy discovery true discoveryttl 600 control no passphrase <unset> snapshotdir <unset> snapshotcompression .tar.lz4 keepalive 60 mapisock /tmp/.s.monetdb.50000 controlsock /tmp/.s.merovingian.50000
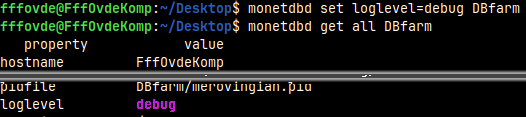
We can easily change any of these settings. monetdbd set loglevel=debug DBfarm
We can also change the settings while DBfarm is active, but some changes will become valid only after Monetdbd is restarted.
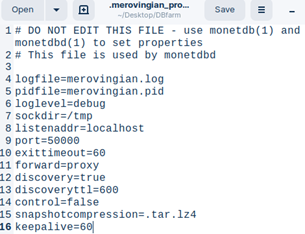
After we first change some property, a list of the properties and their values will appear in the ".merovingian_properties" file.
Not all of the properties that we can observer with the "get all" command will be listed here. Properties that do not appear here can not be changed with the "set" command. Those properties are informative and read only.
We should never make changes in this file manually. We should always use the "set" command.
Monetdbd Settings
We will take a look at settings that we can set with Monetdbd.
File and Log Settings
We know that in DBfarm folder we have files "merovingian.log" and "merovingian.pid". I will choose to use two other files instead of them.
I will change the settings for "log" and "pid" files: monetdbd set logfile=/home/fffovde/Desktop/logy.log DBfarm monetdbd set pidfile=/home/fffovde/Desktop/pidy.pid DBfarm I will start daemon again: monetdbd start DBfarm
Now, we have two new files on the desktop.
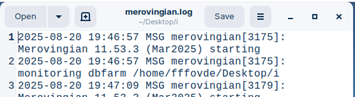
Inside of the "log" file, we have a log for monetdbd. Lines labeled with the MSG, are for information and warnings.
We can decide what will be logged in the log file. We can choose between modes "error, warning, information and debug".
error = only errors
warning = errors and warnings
information = errors, warnings and information
debug = the same as information
Error lines will be marked with ERR.
Default is "information". This is how we change the mode:
# monetdbd set loglevel=error DBfarm
Connection Settings
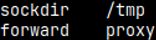
Settings "sockdir" and "forward" should almost never be changed.
Listendaddr is "localhost" by default. That means that our server is not available from the network.
If I set listenaddr to "0.0.0.0", our server will become available from the network. I will also change default port number to 50001.
monetdbd set listenaddr=0.0.0.0 DBfarm monetdbd set port=50001 DBfarm
This setting will become functional only after we restart monetdbd. monetdbd stop DBfarm monetdbd start DBfarm
Inside of the DBfarm, I will create and start one database: monetdb create DBfarmDB monetdb release DBfarmDB monetdb start DBfarmDB
I will now open the green server. I explained creation of this server in this blog post "link". Then I will try to connect to DBfarmDB from the green server. mclient -h 192.168.100.124 -p 50001 -u monetdb -d DBfarmDB
We can use any of these modes for "listenaddr". It is also possible to use "hostname", in that case Linux will resolve what will be used.
Loopback address:
External host:
only IPv4
127.0.0.1
0.0.0.0
only IPv6
::1
::
IPv4 and IPv6
localhost
all
I will change back the port number of the "voc" server to 50000: "monetdbd set port=50000 DBfarm".
Snapshot Settings
In the blog post "link", we have saw how to create a snapshot of our database. We have used stored procedure for that. The same is possible from the command line. Settings for command line snapshots are in monetdbd properties file.
"snapshotdir" is a directory where our snapshot will be made. If this is not set, then we will not be able to make a snapshot.
monetdbd set snapshotdir=/home/fffovde/Desktop DBfarm
"snapshotcompression" is a level of compression. We can choose between "tar.lz4,tar.bz2,tar.gz,tar.xz". This is optional setting.
monetdbd set snapshotcompression=.tar.lz4 DBfarm There is a dot before "tar".
I will set these changes, and then we will create a snapshot. We will create snapshot with the "monetdb" console program.
monetdb snapshot create DBfarmDB
This will create ".tar.lz4" snapshot on our Desktop. Inside of it we will get "DBfarmDB" database.
We can unset a property by providing an empty value:
monetdbd set snapshotdir= DBfarm
Remote Control Settings
We can call and control "monetdbd" on remote computer. I will allow remote control for "monetdbd" on the "voc" server.
monetdbd set control=true DBfarm
We also have to provide SHA512 password.
monetdbd set passphrase=zebra DBfarm
Our password will be written to ".merovingian_properties" file. It will be written as 128-digits hexadecimal number with the prefix "{SHA512}".
If we only have hashed password, then we can provide it directly.
monetdbd set passphrase={SHA512}9df34…24fec DBfarm
We have to restart monetdbd for these settings to become functional. We will also start DBfarmDB database.
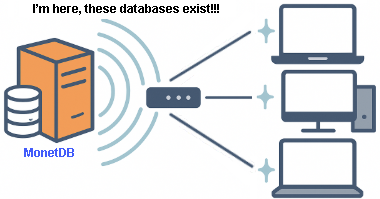
Monetdb can "shout" its existence on the local network by UDP broadcast. In regular intervals Monetdb server will tell other computers on the LAN about its existence. This is how we can discover all of the monetdb servers in our network.
I will tell "voc" server to broadcast its existence every 300 seconds. It will use default port 50000.
monetdbd set discovery=true DBfarm monetdbd set discoveryttl=300 DBfarm
I will restart DBfarm.
monetdbd stop DBfarm monetdbd start DBfarm
On the green server I will run this command. monetdb discover We can see here that on the "voc" server (hostname FffOvdeKomp), we have database "DBfarmDB". We also see local green database. So, we get a list of all of the available databases.
Start and Stop Settings
monetdbd stop DBfarm monetdbd start -n DBfarm
I will stop "DBfarm", and then I will start it with a "-n" switch. This will leave "monetdbd" daemon in the foreground and will not return control to the shell (we will not get prompt in the next line). This is useful for debugging. We can close "monetdbd" using "ctrl+C" and then Enter.
There is "monetdbd" setting "exittimeout" with the default value 60.
This means that "monetdbd" will ask "mserver" to shutdown politely with the SIGTERM command ( "mserver" can refuse ). If the "mserver" is not closed after 60+5 seconds, then "monetdbd" will send SIGKILL signal, and "mserver" will be violently shut down.
There are three possible values for "exittimeout".
POSITIVE VALUE: "Mserver", if alive, will be killed 5 seconds after the "exittimeout".
NEGATIVE VALUE: "Mserver" will only receive SIGTERM signal. It will never be killed.
ZERO: "Monetdbd" will close, but "Mservers" will not. We should not use this.
When we wait for a really long query to finish, our client will not communicate with the server. Firewall can interpret that like an inactive connection, so it will close the connection. We want to avoid this, so we can use probe signal to keep connection alive.
This is done with the "keepalive" setting, with the default value of 60 seconds. # monetdbd set keepalive=60 DBfarm This probe signal will be sent exactly 127 times. If "keepalive" time is 60 seconds, that means that are connection will be at least (127 x 60 seconds) ≈ 2 hours alive.
Monetdbd Return Value
Monetdbd will return "0" for successful action, and "1" for unsuccessful. If we try to start already started daemon, we will get an error. monetdbd start DBfarm; echo $?
Monetdbd Process Signals
I will start the monetdbd again, and then I will read process ID of our daemon. monetdbd start DBfarm cat ./pidy.pid
Let's assume that I want to use some other file, instead of "logy.log", for logging, but I do not want to restart monetdbd. I will do that in the two steps.
monetdbd set logfile=/home/fffovde/Desktop/DBfarm/merovingian.log DBfarm kill -HUP "$(cat ./pidy.pid)"
I am changing the file for my log. I am sending SIGHUP signal to monetdbd, to reload settings.
Now the daemon will stop using "logy.log" file, and will use "merovingian.log" file. We didn't have to restart the daemon.
We can kill monetdbd with a signal. All of the signals bellow work the same. kill -TERM "$(cat "pidy.pid")" kill -INT "$(cat "pidy.pid")" kill -QUIT "$(cat "pidy.pid")"
They will ask our "mserver5" process to gently end (it can refuse). Signals: SIGTERM SIGINT SIGQUIT
Our database ( "voc" ) is just a folder inside of the DBfarm folder. We can backup our database by making a copy of the "voc" folder. The problem is that before doing this we have to wait for the users to finish their queries, and then to prevent them from running new queries.
Disconnecting Users
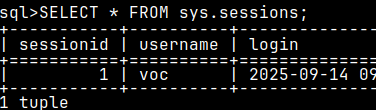
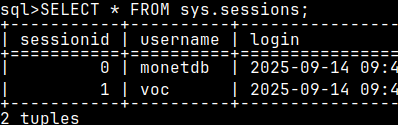
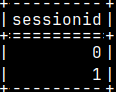
We can check other users by reading form the sessions table. – Column "idle" is timestamp for session "1". This is the moment when that session finished running its last statement. – Column "idle" is null for session "0". In this session we are running current "SELECT … FROM sessions" statement, so this session is busy.
select sessionid, username, idle, login from sys.sessions;
If we estimate that database is not overloaded, then we can assume that all of the existing queries will end in 30 seconds. We will let existing transaction to run 30 seconds more, and then we will close all the connections.
call sys.shutdown(30); This procedure can be called only by the administrator.
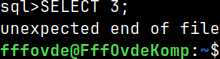
If the "voc" user try to run a query, he will get "unexpected end of file" and his session will end. He will not be allowed to login again.
Shutdown procedure is using SIGTERM command. This procedure will ask database to shutdown, but the database can refuse to do it. In such circumstances we can use the second argument "call sys.shutdown(30, true);". Now we use SIGKILL command, and database will not be able to refuse shutting down.
After calling "sys.shutdown()", admin will still be able to run statements, not only during 30 seconds, but until he decides to leave the session.
If admin quit the session, he will not be able to log into the server again.
At this moment, our database is not locked, but no one can connect to it.
monetdb status -l voc
Connection to this database will be possible only after the restart. But, after stopping the database, we want to prevent users from starting it again. We will lock our database so that only admin can start it again. monetdb lock voc
The last step is to fully stop our database: monetdb stop voc
Restoring Backuped File
We now just have to create a copy of the database folder. This copy can be placed on the same computer or we can move it to some other computer.
We can now release the new database and we can start it. monetdb release vocCopy mclient -u monetdb -d vocCopy
Cleaning Up After File Backup
We will quit and stop database vocCopy. quit monetdb stop vocCopy Now we can delete this vocCopy database: monetdb destroy vocCopy
Original "voc" database is still in the maintenance mode. We will release it with "monetdb release voc".
Hot Backup of a Database
A hot backup is the same as a file backup, but we don't have to stop the database. We'll make a copy of the database files while our database is still running.
Local Copy
As admin, we will call "hot_snapshot" procedure. The result will be our "voc" folder packed inside of the "tar" format. mclient -u monetdb -d voc #password monetdb call sys.hot_snapshot('/home/fffovde/Desktop/backup.tar');
It is also possible to create compressed tar file. We can use ".lz4, .gz, .bz2, .xz" compression. call sys.hot_snapshot('/home/fffovde/Desktop/backup.tar.lz4');
We can grant privileges of using our procedures to any user.
grant execute on procedure sys.hot_snapshot(string) to voc; grant execute on procedure sys.shutdown(tinyint) to voc;
Remote Copy
We will now backup database from the green server. Green server allows external access from the network. I explained how to create green server in this blog post "link".
We will open the green Database, on the green server. monetdbd start /home/sima/monetdb/DBfarmG monetdb start DatabaseG
From the "voc" server, we will login to the green server: mclient -h 192.168.100.145 -p 50000 -u monetdb -d DatabaseG
We will call "hot_snapshot", but we will provide second argument "false". That means that backup shouldn't be created on the server, but on the client. Backup of the green database will appear on the "voc" server. callsys.hot_snapshot('/home/fffovde/Desktop/backupGreen.tar', false);
Restoring Hot Backup
First, we will extract "voc" folder from the "tar" or compressed file.
I will place folder "DatabaseG" into farm folder on the "voc" server, and I will log into it. mclient -u monetdb -d DatabaseG#password monetdb Now, we have green database on the "voc" server.
Cleaning Up After Hot Backup
I will quit green database session, and I will delete this database on the "voc" server. quit monetdb stop DatabaseG monetdb destroy DatabaseG
A database schema is a list of all database objects and their attributes, written in a formal language. If we already have a ubiquitous formal language for creating database objects, SQL, then we should use SQL language for writing our schema.
If our server understands a particular dialect of SQL, it can read the list of SQL statements and, based on that, can create the entire specified database.
Specification is provided as a file with a "*.sql" extension.
A schema is useful when we want to create a database according to a specification. But we want to back up our database, and for that we need a backup of the data in addition to the schema. We can include INSERT INTO statements with all the data, in a schema. Now we have a file that is an exact symbolic image of our database, and can be used as backup file.
We already used such file in the blog post about sample MonetDB database "link". This file, with a data, can also be considered as a schema file, in the broader sense.
Qualities of the Good Schemas
Database objects should be created in the proper order. For example, tables should be created before we create views that are based on those tables. Here we can see recommended order of statements:
a) CREATE SCHEMAS b) CREATE SEQUENCES c) CREATE TABLES d) ALTER TABLES for FOREIGN KEYS e) CREATE INDEXES
f) CREATE VIEWS g) CREATE FUNCTIONS and PROCEDURES h) CREATE TRIGGERS i) INSERT INTO data j) GRANT/REVOKE
When running schema file, we should wrap it into transaction to avoid incomplete creation.
Credentials
In this blog post "link", I have show you how to create a file with credentials, and we placed it into $HOME folder ( "/home/fffovde" ) on the "voc" server. If we have such file, we don't need to provide credentials, for MonetDB, every time we run some command in the shell.
You can notice bellow that I will run my Msqldump commands without providing credentials, by using such file. Users can only backup database objects they have access to, so with administrator account we will be able to backup everything.
Msqldump
Msqldump is a console program used to create a schema from an existing MonetDB database. The resulting file can be used for backups or to migrate the database to another MonetDB server. With some manual tweaking of this file, we can use it to migrate database to a server other than MonetDB (perhaps Postgres or MySQL).
We should redirect the result of this app to the file on our computer. msqldump -d voc > /home/fffovde/Desktop/voc_db.sql
If we don't, the long schema will go to stdin, and we usually don't want that.
By default, instead of the INSERT INTO statements, our schema will return "COPY FROM stdin" statements. This will make restoring of the database faster.
We can use "-e" switch to add NO ESCAPE clause to COPY statement. msqldump -d voc -e > /home/fffovde/Desktop/voc_db.sql
For returning INSERT INTO statements, we should use "-N" switch. msqldump -d voc -N > /home/fffovde/Desktop/voc_db.sql
Partial Backup of Database
Option "-f" means that we will only backup functions. msqldump -d voc -f > /home/fffovde/Desktop/voc_db.sql
With option "-t", we can backup only one table. We should provide fully qualified name of a table, because default schema for administrator is sys ( we are logged in as administrator ). msqldump -d voc -tvoc.invoices> /home/fffovde/Desktop/voc_db.sql
With wild cards we can backup a set of tables with a similar name. This code bellow would return only tables "passengers, seafarers and soldiers". msqldump -d voc -t voc.%ers > /home/fffovde/Desktop/voc_db.sql
With upper letter "-D voc", we will export database without data. msqldump -Dvoc > /home/fffovde/Desktop/voc_db.sql
Location of A Schema File
We don't have to use redirection to a file. We can use option "-o". msqldump -d voc -o /home/fffovde/Desktop/voc_db.sql
We can export our database to a folder. In that case switch "-O" is using upper letter. msqldump -d voc -O /home/fffovde/Desktop/voc_db_folder
If we export database to a folder, that folder will contain all of the DDL ( data definition language ) statements inside of the "dump.sql" file, but the data will be one separate CSV file for each table. CSV files will not have a header (because we have CREATE TABLE statements in the "dump.sql"), delimiter will be TAB.
Only when we use export to a folder, it is possible to use "-x" option. CSV files will be compressed to that file format. We can use "lz4,gz,bz2,xz". msqldump -d voc -x lz4 -O /home/fffovde/Desktop/voc_db_folder
Credentials in the Command
I will now move my credentials to temporary folder, so from now we will have to provide credentials to Msqldump. mv /home/fffovde/.monetdb /tmp/.monetdb
Name of our user now has to be provided with the switch "-u". msqldump -u monetdb -d voc -o /home/fffovde/Desktop/voc_db.sql
Password is always provided separately.
I will now jump into green server. I explained how to create green server in this blog post "link". I am using this server because that server is set to accept external connections. Green server has IP address "192.168.100.145" and database DatabaseG.
I will run this command on the green server, so I am just doing backup locally. msqldump -h 192.168.100.145 -p 50000 -u monetdb -d DatabaseG -o /home/sima/Desktop/DatabaseG_db.sql
I will now run the same command from the "voc" server. This will backup "DatabaseG", from the green server, onto "voc" server. msqldump -h 192.168.100.145 -p 50000 -u monetdb -d DatabaseG -o /home/fffovde/Desktop/DatabaseG_db.sql
In the previous blogpost "link", I have created purple server, which is protected with TLS. IP address of this server is 192.168.100.152, and its database is "tlsDB". I will now run this command on the "voc" server to backup database from the purple server. msqldump -u monetdb -d 'monetdbs://192.168.100.152:50000/tlsDB?cert=/home/fffovde/selfsigned.crt' -o /home/fffovde/Desktop/tlsDB_db.sql
By providing IP address and the port number, we can backup database locally, or we can pull it from the remote server, even if it is protected with TLS.
Other Msqldump Options
We will run these commands on the "voc" server.
Whichever way we create a backup, at the beginning of the sql file, we will have a welcome message. msqldump -u monetdb -d voc -o /home/fffovde/Desktop/voc_db.sql
We have to add "quiet" switch to avoid that message. msqldump -q -u monetdb -d voc -o /home/fffovde/Desktop/voc_db.sql
If we use "-X" option, we will get message for every step msqldump is doing.
By running this command in the shell, we will get a list of all of the possible options in Msqldump.
msqldump -?
We can notice that longer syntax for any option exists, too:
msqldump --help
Usage: msqldump [ options ] [ dbname ] -h hostname | --host=hostname host to connect to -p portnr | --port=portnr port to connect to -u user | --user=user user id -d database | --database=database database to connect to -o filename | --output=filename write dump to filename -O dir | --outputdir=dir write multi-file dump to dir -x ext | --compression=ext compression method ext for multi-file dump -f | --functions dump functions -t table | --table=table dump a database table -D | --describe describe database -N | --inserts use INSERT INTO statements -e | --noescape use NO ESCAPE -q | --quiet don't print welcome message -X | --Xdebug trace mapi network interaction -? | --help show this usage message --functions and --table are mutually exclusive --output and --outputdir are mutually exclusive --inserts and --outputdir are mutually exclusive --compression only has effect with --outputdir
Environment Variables
Environment variables are global variables that can be accessed by any process. They are key-value pairs that provide a way for processes to communicate with each other and the operating system.
We can list all the environment variables with "printenv".
For specific variables we just grep the result of "printenv": printenv | grep home
If we know the name of variable, then we can read its value with "echo": echo "$HOME"
My local time is set to Serbian. echo "$LC_TIME" #sr_RS date# нед, 10. авг 2025. 09:48:22 CEST
For this session I will set it to English. Set means that we will create or update variable. export LC_TIME=en_US.utf8 date# Sun 10 Aug 2025 09:56:16 AM CEST
With "unset", we will remove variable from the current session. unset LC_TIME echo "$LC_TIME"
# export LC_TIME=en_US.utf8 This command will set environment variable permanently if we write it to the file "$HOME/.bashrc". cat /home/fffovde/.bashrc After that, we reload this file with: source ~/.bashrc#tilda is the same as $HOME, or "/home/fffovde" in this case.
DOTMONETDBFILE Environment Variable
If we want to make our Msqldump commands shorter, we can place values for some of the options into file. DOTMONETDBFILE is an environment variable with the path toward that file.
In the temporary folder I already have the file ".monetdb". It has username and password. This is the file we have moved before. I will add IP address and port number of the green server into this file. nano /tmp/.monetdb I will set my DOTMONETDBFILE environment variable to this file. This will be valid for one session. export DOTMONETDBFILE=/tmp/.monetdb
Now we can use Msqldump, to backup DatabaseG from the green computer, without providing all the credentials inside of the command. All the credentials are already stored in the ".monetdb" file. msqldump -d DatabaseG -o /home/fffovde/Desktop/DatabaseG_db.sql
Default Folders for .monetdb File
DOTMONETDBFILE is only used if we want to keep ".monetdb" in non-standard folder. For standard folders, we don't need DOTMONETDBFILE. We just have to place the file into one of the standard folders, and this is how we used ".monetdb" file before the talk about environment variables.
1) Current directory. 2) Path inside of the $XDG_CONFIG_HOME variable (if exists). 3) $HOME directory.
Msqldump will first look for a ".monetdb" in the current directory, then in $XDG_CONFIG_HOME, and at the end in the $HOME ( /home/fffovde ).
I will move ".monetdb" file into "/home/fffovde", and I will disable DOTMONETDBFILE: mv /tmp/.monetdb /home/fffovde/ unset DOTMONETDBFILE
If we now try to run Msqldump, it will read ".monetdb" from the current folder and will work. msqldump -d DatabaseG -o /home/fffovde/Desktop/DatabaseG_db.sql

Ignoring Default Folders
If we set DOTMONETDBFILE to empty string, Msqldump will ignore all of the configuration files, and will always ask for credentials.
# export DOTMONETDBFILE=""
From here you can download "voc" database sql dump file (schema file).