Self signed key is useful when we want to protect communication between two devices that are under our control. In this case there is no "mutual friend" ( Certificate Authority ) that will sign our certificate.
As a result, we will get one private key and 1 certificate. Our private key will be used to sign a certificate.
Self Signed RSA Key
This is OpenSSL command that will create RSA private key and self signed certificate. Let's dissect this command.
cd /home/fff/Desktop openssl req -x509-sha256-noenc-days 365-newkey rsa:2048-keyout private.key-out certificate.crt
req -x509
This command is asking for creation of a self signed certificate.
-sha256
Certificate data hash will be made by using SHA algorithm.
-noenc
Private key will not be encrypted. This is needed if we want to use our key automatically.
-days 365
Our certificate will be valid from today ( 20.06.2026. ) till 20.06.2027.
-newkey rsa:2048
We will create RSA asymmetric key with size of 2048 bits.
-keyout private.key
In the current directory we will get a file with a private key.
-out certificate.crt
In the same directory we will get certificate file.
In terminal, we will now get a list of questions about certificate owner. "RS" – 2 code abbreviation of a country name. "Belgrade" – state or province. "Belgrade" – city. "Example Corp" – the name of the organization. "Analytics Department" – department inside of the organization. "Polychronis Hikari" – personal name. This is certificate for a person. "hikari@gmail.com" – email address of that person.
Reading of Private Key and Certificate
We will use "x509" command to read our certificate: openssl x509 -in certificate.crt -text -noout
We can notice that Issuer and Subject are the same. That is because this is self signed certificate. Algorithm used is SHA256 and RSA. The certificate is valid for 365 days from today.
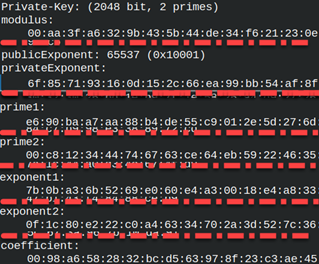
For reading the private key, we use "pkey" command with similar options as for a certificate. openssl pkey -in private.key -text -noout
The result will have a list of hexadecimal numbers. All of these numbers belong to RSA key. We can notice Modulus (N), Private (E) and Public (D) exponents, Prime 1 (P) and Prime 2 (Q). We used letters N, E, D, P, Q as variables for the explanation how RSA calculation works.
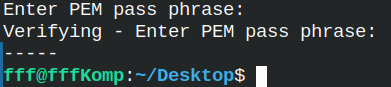
For reading of this key, we don't have to provide a password because the key is not encrypted.
CN Property Clarification
CN means "common name". CN is a text property. CN Property exists in the Subject and Issuer elements of the certificate.
Issuer: CN = Let's Encrypt R12
This is the name of a certification authority.
Subject: CN = example.com CN = Polychronius Hikari CN = My Root CA
Here we write domain name, or a person name, or the purpose of a key. The goal is to identify for what purpose will this key be used.
Long ago, CN for Subject was important because this was the place where we wrote a domain name. Internet browser would then verify this domain name with URL that client is trying to connect to. Long ago CN was one of the most important parts of a certificate.
The problem with CN is that was accepting only one domain. Users were not able to have many domains signed by the same certificate. Today the CN is not validated by modern internet browsers. Instead of CN we use SAN ( "Subject Alternative Name" ). SAN is part of extensions in a certificate. SAN has ability to accept several domain names.
Providing CN and SAN Value in "req -x509" Command
We can provide "C,ST,L,O,OU,CN,emailAddress" data with "-subj" option. We can provide SAN data with "-addtext" option.
For SAN data, we must define type of the protocol ( "email, DNS, IP" ). I will run the command above. This time we will not get prompts to provide "C,ST,L,O,OU,CN,emailAddress" data. We can read our certificate.
At the bottom of "Data:" section we have extensions. Here we can see the value of SAN extension. SAN is not the only extensions that can be defined with "-addext" option. All extensions can be provided this way.
Root Domain, Wildcard Domain, Multidomain
-addext "subjectAltName=DNS:www.example.com"
This is valid for "https://www.example.com", but not for "https://example.com" and "https://shop.example.com".
DNS:www.example.com
Root domains are only valid for the specific domain with precisely the same name.
DNS:www.example.com,DNS:maps.google.com
Multidomain is set of several domains. We can use the certificate for all of them.
DNS:*.example.com
This is wild card domain. It is only useful for one level subdomain. Think about it as "<anything>.example.com". This wildcard domain will not work for "example.com" and "a.b.example.com", but it will work for "www.example.com" and "shop.example.com".
We can combine these domain names in different ways.
For EC keys we must choose a "curve". This is parameter that is deciding the strength of the key.
ec_paramgen_curve:prime256v1 # most popular for web sites ec_paramgen_curve:secp384r1 # stronger, for governments and banks ec_paramgen_curve:secp521r1 # strongest, but rarely used
openssl ecparam -list_curves
We can list all of the curves by using this command. There are dozens of these curves.
When we use "-pkeyopt", we choose a curve. Instead of that we can choose algorithm directly. Algorithm already has a curve specified. These are newer algorithms. For algorithms we are using option "-algorithm". These are two used the most.
-algorithm X25519
-algorithm ED25519
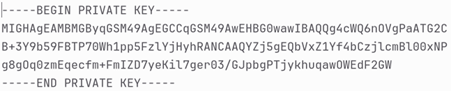
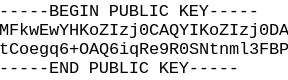
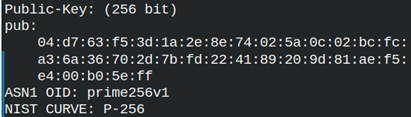
EC keys are much smaller than RSA keys. On the image we can see the whole key. That is why EC is faster than RSA.
Exporting a Public Key
We can get a public key based on the private key. openssl pkey -in private.key -pubout
-----BEGIN PUBLIC KEY-----
MFkwEwYHKoZIzj0CAQYIKoZIzj0DAQcDQgAE12P1PRoujnQCWgwCvPyN8q1CR/Pl
tCoegq6+OAQ6iqRe9R0SNtnml3FBPUijajZwLXv9IkGJIJ2BrvXkALBe/w==
-----END PUBLIC KEY-----
We can get public key from the certificate. openssl x509 -in certificate.crt -pubkey -noout
-----BEGIN PUBLIC KEY----- MFkwEwYHKoZIzj0CAQYIKoZIzj0DAQcDQgAE12P1PRoujnQCWgwCvPyN8q1CR/Pl tCoegq6+OAQ6iqRe9R0SNtnml3FBPUijajZwLXv9IkGJIJ2BrvXkALBe/w== -----END PUBLIC KEY-----
Linking Private Key and the Certificate
We can see above that exported public keys, from the private key and from the certificate, are the same. We can use that fact to detect linked private keys and certificates. Because public keys can be long, we will create digest from them, so we can easily compare those digests.
Now we can eyeball that this private key and this certificate are linked together.
Exporting and Reading Public Key
This is how we can export public key to a file. openssl pkey -in private.key -pubout -out public.pub
Pkey is a command for reading a private key. If we use option "-pubin", we can also use it to read public keys. openssl pkey -in public.pub -noout -text -pubin