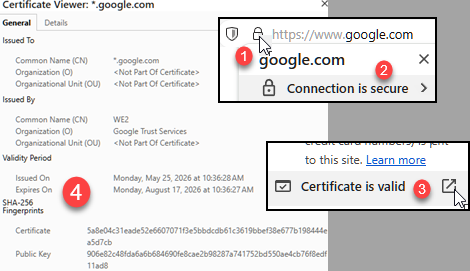
 | In the internet browser we can observe certificate of some web site. First, we click on the padlock in the address bar (1). We click on "Connection is secure" (2). Then we click on the icon (3). After that a new dialog with a certificate will open (4). We can also observe certificate with OpenSSL. OpenSSL has command "s_client" that is used to test and monitor TLS connection. When we use this command, terminal will enter interactive mode where we can type HTTP, SMTP, POP3, LDAP commands. This assumes that "s_client" is connected to some server application and can now communicate with that application using its protocol. For example, SMTP is computer protocol used for sending emails. We are not going to use this client in interactive mode in this article. We will use it only to observe TLS information. |
Certificate
S_client Interactive Mode
This command will connect OpenSSL to web site as a TLS client. openssl s_client -connect www.example.com:443 As a result, we would get a lot of text, and after that text we will get a prompt. Prompt means that we are in the interactive mode. | 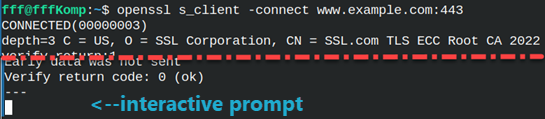 |
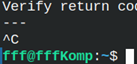 | I will click "Ctrl+C" to exit this prompt. |
"/dev/null" is a feature of terminal. This means that s_client will not receive commands from a keyboard, but from a file. File "/dev/null" is empty file. This will send EOF ( end of file ) signal to s_client and s_client will immediately exit interactive mode. I will use this to avoid interactive mode. openssl s_client -connect www.example.com:443 </dev/null | 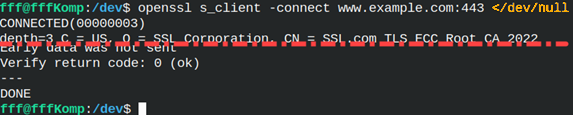 |
Reading the Certificate with S_client
OpenSSL command "x509" is for working with certificates. Text returned by the "-connect" command can be piped to "openssl x509" command. |
openssl s_client -connect example.com:443 </dev/null | openssl x509 |
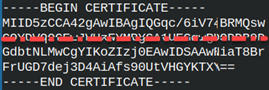 | Certificate will be returned in PEM format. This is base64 encoded format. This format prints each 6-bits with a printable character. | We want nicely presented text, like on the image to the right. To get this text we have to use "-text" option. | 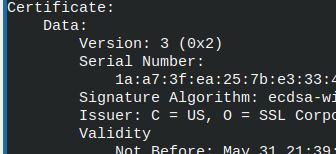 |
| Without options we have PEM format. With " -text" option we have PEM, and human readable format. With " -text" and "-noout" we only get human readable format. | 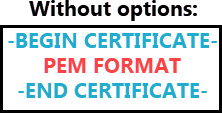 | 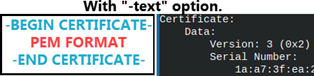 | 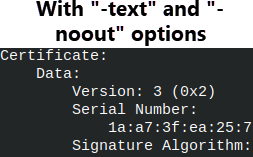 |
| So, the full command will be like this. "-text" will give us nicely formatted certificate, and "-noout" will suppress PEM format. |
openssl s_client -connect example.com:443 </dev/null | openssl x509 -text -noout |
Main Sections of a Certificate
| Certificate is divided into 3 sections. | – Data: This is certificate in a readable form. – Signature Algorithm: This algorithm CA used to sign the certificate. – Signature Value: This is certificate signed ( encrypted ). CA used "Signature Algorithm" to encrypt "Data" and the result is "Signature Value". Here we have all of the elements to identify the owner and to verify his identity. | 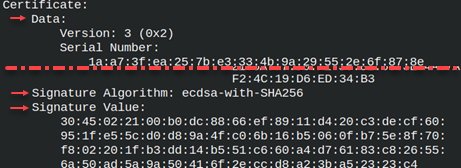 |
Data part is mostly hidden on the image above, but that is the biggest part of the certificate. It contains info about CA and certificate owner, data about certificate itself, and the public key of the certificate owner.
Data Section Content
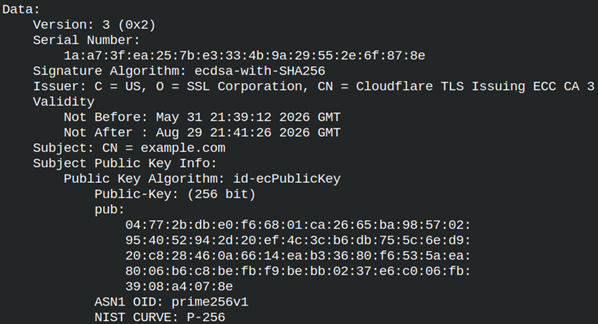 | Version – there are several generations of certificates specification. Today we use version 3. Serial Number – our CA is using this number to distinguish our certificate from other certificates issued by the same CA. Signature Algorithm – CA used ECDSA asymmetric key to sign our certificate. Issuer – Data about CA. We can see the country ( "C" ), organization legal name ( "O" ), common name ( "CN" ). "CN" is for less formal name of the organization. Validity – Period in which our certificate is valid. Subject – this is where we place the name of domain ( example.com ). Subject Public Key Info – data about certificate owner public key. Here we can see algorithm, the size of a key and the key itself. |
Below this we have extensions. Extensions are specialized elements and we will talk about in some other article.
Reading Only Some Sections of a Certificate
We can limit our command to read only some elements.
openssl s_client -connect example.com:443 </dev/null \ |  |
openssl s_client -connect example.com:443 </dev/null \ |  |
S_client
ServerName Option
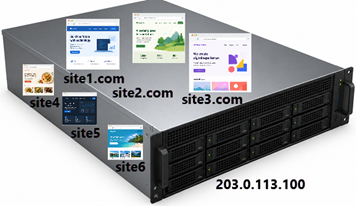 | Cloud providers can host several web sites behind one IP address. Each of those sites can have its separate certificate. Cloud provider must know in advance what certificate to send to the user. This is why for s_client we must use option "-servername". openssl s_client -connect www.google.com:443 -servername maps.google.com |
| Look below how we are getting different answer depending on the servername we use. |
openssl s_client -connect www.google.com:443 -servername maps.google.com </dev/null | openssl x509 -noout -subject subject=CN = *.google.com <<<<< |
openssl s_client -connect www.google.com:443 -servername www.google.com </dev/null | openssl x509 -noout -subject subject=CN = www.google.com <<<<< |
Quiet and Brief Options
With "-quiet" option we will start interactive mode, without getting certificate. openssl s_client -connect www.example.com:443 -quiet |  |
"-brief" option is similar, but we are still getting some essential data. openssl s_client -connect www.example.com:443 -brief | 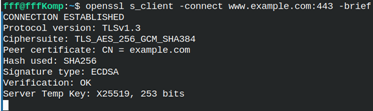 |
"-Brief" allow us to see what cipher suite and protocol version the client and the server made an agreement to use ( TLSv1.3: TLS_AES_256_GCM_SHA384 ).
Protocol and Cipher Suite Options
We can force the protocol s_client will use. openssl s_client -connect www.example.com:443 -brief -tls1_2 |  |
We can enforce specific cipher suite. openssl s_client -connect www.example.com:443 -brief -tls1_2 -cipher AES256-SHA256 |  |
We can block protocol TLSv1.3. openssl s_client -connect www.example.com:443 -brief -no_tls1_3 |  |
Certopt Option
We already saw that certificate includes public key of the certificate owner, and it has sections Signature Algorithm and Signature Value. We can use option "-certop" to suppress those elements. We can suppress both elements or only one of them.
openssl s_client -connect www.mwl.io:443 < /dev/null | openssl x509 -text -noout -certopt no_pubkey,no_sigdump
This part will be missing because of "no_pubkey". 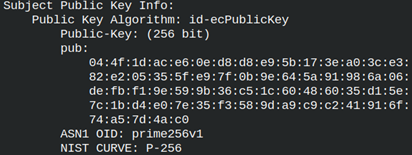 | "no_sigdump" will make two last sections to be excluded. 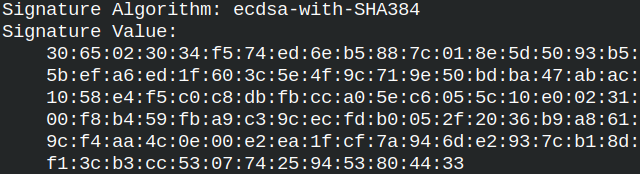 |
Certificate Chains
In our browser we will take a look at certificate for the web site "www.example.com". In the "details" tab we can see so-called "certificate chain". Chain certificate means that sometimes we need more certificates to prove that the certificate we own is valid. These certificates are connected in a hierarchy with root certificate at the top ( CA certificate ), and leaf certificate at the bottom ( example.com ). Between them we can have several intermediate certificates. | 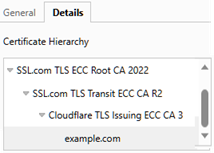 |
If we want to read all of these certificates we need "-showcerts" option. openssl s_client -connect www.example.com:443 -servername www.example.com -showcerts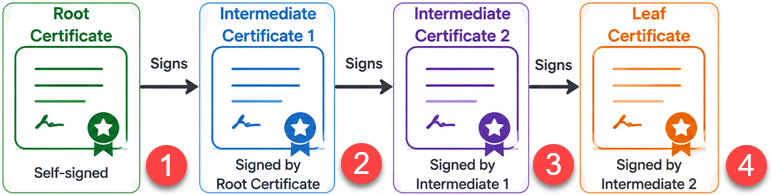 We will get 4 "BEGIN/END CERTIFICATE" elements => We will get 4 "BEGIN/END CERTIFICATE" elements => | 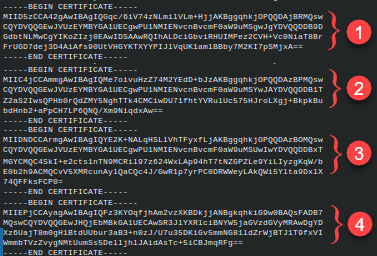 |
Certificate chain can not be presented in nice readable form with the use of "x509" command, only in PEM format.
Certificate Export
The whole chain of certificates can be exported to a file with simple redirection. openssl s_client -connect www.example.com:443 -showcerts < /dev/null > /home/fff/Desktop/certificates.chain |  |
We can save leaf certificate nicely formatted with x509 command and "-out" option. openssl s_client -connect www.example.com:443 < /dev/null | openssl x509 -text -out /home/fff/Desktop/certificate.crt |  |
We saw that our certificate can be in the PEM format. There are other formats, like DER format which is a binary form of format. We can specify in which format to export certificate with "-outform" option. openssl s_client -connect www.example.com:443 </dev/null | openssl x509 -outform PEM -out /home/fff/Desktop/PEM.crt | 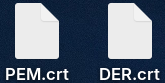 |
Errors
We can test TLS errors on the web site "www.badssl.com". Option "-verify return error" will suppress showing of the certificate and will return much smaller message where we can easily notice what is the problem with the certificate.
openssl s_client -connect expired.badssl.com:443 -verify_return_error |  |
Hostname Verification
If we go to a website ( x.com ) and download its certificate, but inside the certificate we see another domain ( y.com ), our internet browser will show us a big warning. This will not happen with the s_client tool. S_client will only check if the certificate is signed by a trusted CA and if it has expired. For domain check we must use "-verify_hostname" option. | 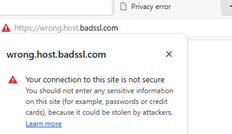 |
For this domain, certificate and domain match. openssl s_client -connect www.example.com:443 |  |
It is the same with "-verify_hostname" option, but this time we get a verification message. openssl s_client -connect www.example.com:443 -verify_hostname www.example.com |  |
For this web site we will get a warning because we have mismatch. openssl s_client -connect wrong.host.badssl.com:443 -verify_hostname wrong.host.badssl.com Web site we are visiting has two level subdomains ( wrong.host.badssl.com ), but certificate is only for one level subdomain ( host.badssl.com ). |  |
OpenSSL TLS Server
Key Generation
| I will create a private key and certificate. I need them for a demonstration. You don't need to understand the command below for now. |
cd /home/fff/Desktop openssl req -x509 -newkey rsa:2048 -noenc -subj "/CN=localhost" -keyout key.key -out certificate.crt |
We will get two files. Inside of them are base64 encoded key and certificate. I will now show you how to create TLS server with OpenSSL. |  |
TLS Server in OpenSSL
In one terminal tab I will start a server with a command "s_server", and in another terminal tab I will connect to that server by using "s_client". Both of them will use the key and certificate we have created in the previous step. We will start them both in the interactive mode.
openssl s_server -port 4433 -key key.key -cert certificate2.crt | openssl s_client -connect localhost:4433 |
 | We can see on the image to the left how our server looks like. Our server has a prompt. In another tab we have s_client prompt. |
| We can now have secure instant chat between the server and the client. Everything we type in the server will be immediately visible on the client, and vice versa. This is how we use keys with any application. Server needs access to private and public key, and client only to public key. | 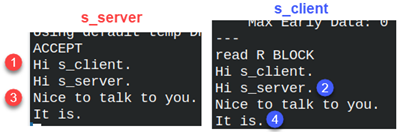 |
| We can force server or client only to accept specific cipher suites and TLS generations. |
openssl s_server -tls1_3 -ciphersuites TLS_AES_256_GCM_SHA384 -key key.key -cert certificate.crt #default port is used |
openssl s_client -tls1_3 -ciphersuites TLS_AES_256_GCM_SHA384 -connect localhost:4433 |