Introduction
Virtual Machines
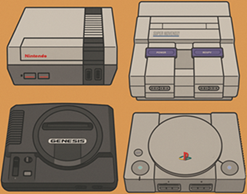
| People used to love playing games on old game consoles. People would continue to play those games, but those consoles are no longer for sale, so there are no devices available on which to play these old games. | To solve this problem, emulators are born. Emulators are programs that you install on your computer, and they imitate retro game consoles. In that way, people can still play their favorite video games, even without the game console. | Emulator is simulating the actual hardware. For video games it doesn't matter if they are running on an emulator or on the real device. |
 | 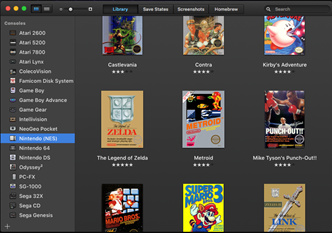 | 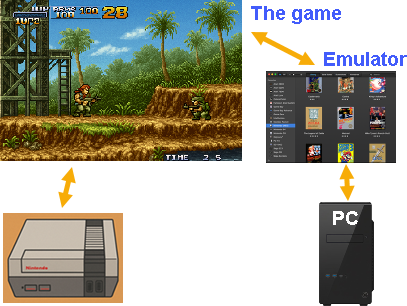 |
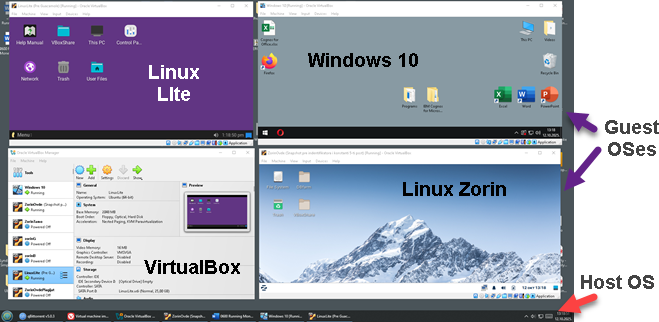
| It is also possible to emulate Operational System with all the programs on that system. It is just like we have several computers inside of the one computer case. | Emulator for OS is called hypervisor. One such hypervisor is VirtualBox. VirtualBox is application that we install on our computer, and then we create "virtual machines". A virtual machine (VM) is a software-based emulation of a physical computer that runs its own operating system and applications. With VirtualBox, we can use virtual machines like any other application. |
 |  |
Container
Container is something in between portable application and virtual machine.
| Portable application | Container | Virtual machine |
| – Application that doesn't need installation. – It should match OS version. – Lightest and fastest. – Not isolated from other applications. | – Application with most of its dependencies. – It should match class of OS (Linux, Windows…). – Middle weight. – Mostly isolated. | – Full OS with all the applications. – Should match hypervisor. – Heavy weight. – Fully isolated. |
| We could say that container is stripped down virtual machine. If we limit virtual machines to only one application, and we force virtual machines to share kernel with the host machine, then we would get containers. VM – kernel – other apps = container Containers doesn't use hypervisor. They use docker engine. Docker engine is just an application, just like VirtualBox. | 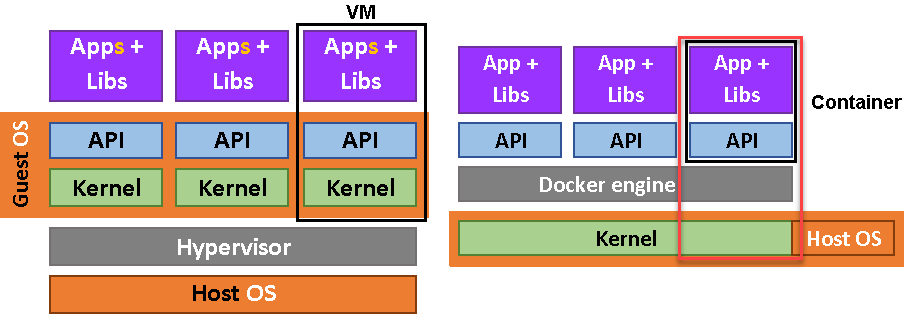 |
Containers are similar to portable applications, they can be easily deployed, moved, and upgraded. In addition, containers are isolated from other applications and will not compete for resources between them. Containers are much lighter and faster than virtual machines. Containers are immutable, so it is not possible to update parts of the container. This gives us consistency that we can rely on.
Usage of a Container
Images are templates used to create containers. An image contains everything needed to build a single container. Images are created by application developers. A developer would create an image and then provide it to users, who would then be able to create containers based on the image.
Let's say we want to publish our application as an image. We will package all our source code along with a "Dockerfile" (explained later) into a single folder. We would use the "Build" command to create a "Docker image". The image is the template from which containers are built. We will upload that image to a Docker image repository (registry). "Docker hub" is a well-known cloud image registry. Users can download our image from the registry. Based on that image, the user will launch the container. In the container, the user would find the application we created.

Anatomy of a Dockerfile
If we go to this git hub web page "link", we will find an example of files that are needed to create an image for MonetDB.
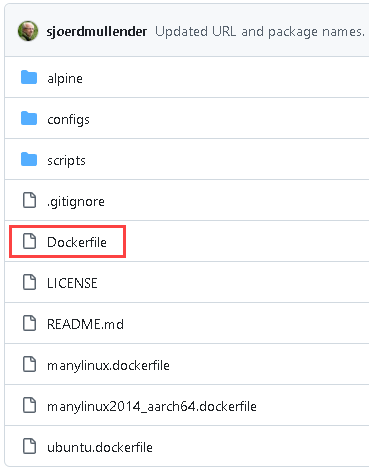 | Here we can see source files for MonetDB, and among them there is a file with a name "Dockerfile". This file is an instruction for docker image creation." Dockerfile" for MonetDB is a more complex one, so I will show you another one that is simple. => | "Node.js" is a framework for making web applications. The Dockerfile below is instructions on how to make docker image based on the "Node.js" application. "FROM" command will download stripped down linux distro from the "Docker Hub" cloud. That stripped linux distro will give system API for our application. After that, we will define working folder, we will copy our application into that folder, and we will install all dependencies for our app. The last line will start our application when a user starts the container. FROM node:22-alpine # ALPINE is a tiny linux distro, with node.js installed.WORKDIR /app # we set the working directory inside of the ALPINE linux. COPY . . # we copy from the current directory on the host # machine to "/app" directory inside of the ALPINE linux. RUN npm install # we install dependencies that are listed inside of our project, into image CMD npm start # this command will run when our container starts. |
| All Dockerfiles are made like this. They usually have the same steps: | 1) get linux image for API | 2) define a folder | 3) copy your application | 4) download dependencies |
| 5) build/compile | 6) create user | 7) expose network ports | 8) set some environs | 9) define startup command |
Docker file is basically a list of steps we would take on a physical machine to make our application operational. We will not go any deeper into docker technology. In this article we will only learn how to install docker and download and use MonetDB container.
Installation of a Docker
On this web page we can read how to install Docker on Ubuntu. It is a long page, but we can take a shortcut.
https://docs.docker.com/engine/install/ubuntu
On the bottom of that page, we will find a script. We can download and run this script. That means that we can install docker with two lines of code: curl -fsSL https://get.docker.com -o get-docker.sh |  |
We should add our user to docker group.sudo usermod -aG docker $USER | After that we should log out and log in. |
We can now confirm that docker is installed:docker version | 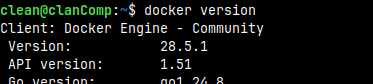 |
Monetdb Container Installation
Getting a Monetdb Image
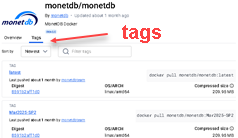 | MonetDB containers are hosted on "Docker Hub". MonetDB team will create a new container for each new version of MonetDB. We can find a list of all the MonetDB versions on this page: https://hub.docker.com/r/monetdb/monetdb/tags The name of each version is made of three elements: nameOfDockerHubAccount / nameOfApplication : versionNumber |
We can download the latest version to our computer using this command. docker pull monetdb/monetdb:latest |  |
 | We type this command to observe our images. In non-compressed state, our image is 536 MB. docker images |
"Tag" is a version of the image. If we don't provide a tag, we will always get the "latest" version.
Starting MonetDB Container
| This is how we can start MonetDB containers. ALPINE linux will expose the server on the default port 50.000, but we must tie that to the host port number. We will use again 50.000 for the host port number. By default, our farm will be on location "/var/monetdb5/dbfarm" inside of the container. The name of default database will be "monetdb". We can set an environ with administrator password like "-e MDB_DB_ADMIN_PASS=monetdb2". docker run -p50000:50000 --restart unless-stopped -e MDB_DB_ADMIN_PASS=monetdb2 monetdb/monetdb:latest |
 |
The server will stay in the foreground in the terminal. We will open a new tab inside terminal and there we will type: docker ps #this will list opened containers |
We can connect to bash in the new container. "28629" are start figures of the container ID. We will be connected as a root. docker exec -it 28629 bash |
Administrator is "monetdb", and the default database is "monetdb". Password is "monetdb2" and it is set through environ MDB_DB_ADMIN_PASS.mclient -u monetdb -d monetdb# monetdb2 is password | 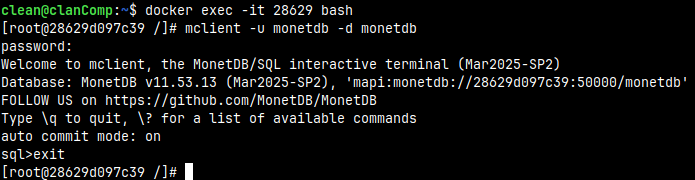 |
What Will Happen If We Reboot Computer
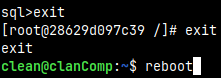 | I will exit bash, and then I will reboot my computer. We used option below with the "docker run" command. This option will make our container to automatically start when the computer starts. It is only possible to stop it manually. --restart unless-stoppedIf we don't want container to start automatically, we use the default " --restart no". |
After restart "docker ps" command will show containers active on our computer. We can see that our container STATUS is "Up 43 seconds". |
If we type "docker ps -a" we would get all the containers on our computer, both stopped and active.
I will stop the container. docker stop 28629 |  |
| There are now no active containers, just one stopped container. |  |
We can now delete stopped container:docker rm 28629This command would delete all the stopped containers: docker container prune | 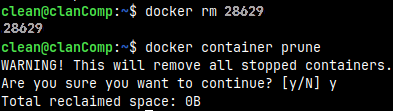 |
MonetDB Container Options
docker run -d -p50000:50000 \ -e MDB_CREATE_DBS=db1,db2 \ -v data-vol:/var/monetdb5/dbfarm2 \ -e MDB_SNAPSHOT_COMPRESSION=.tar.bz2 \ -e MDB_LOGFILE=/logfile \ -e MDB_FARM_PROPERTIES=exittimeout=70,keepalive=70 \ -e MDB_DB_PROPERTIES=nthreads=10,ncopyintothreads=10 \ -e MDB_DB_ADMIN_PASS=monetdb2 \ -e MDB_DAEMON_PASS=daemonPass \ monetdb/monetdb:latest | We will now start the container again, but with fully customized options.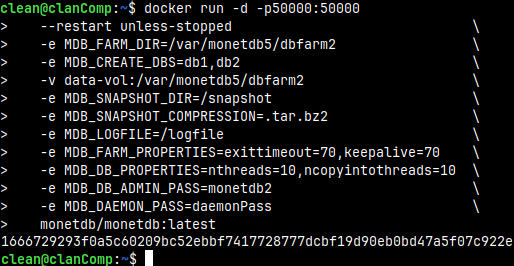 |
Above we use the "-d" option to detach our container. This means that after we run this command, docker will not remain in the foreground, but we will get the command line again, so we can continue typing commands in the same shell.
| At the bottom of the image, we can see ID of the new container. | 1666729293f…. |
MDB_FARM_DIR and MDB_CREATE_DBS
We can define in which directory in the container our farm will be created. That is defined with MDB_FARMDIR. With MDB_CREATE_DBS, we can create one or several databases. Between the names of databases there must be no spaces, just the comma.
-e MDB_CREATE_DBS=db1,db2 | I will again enter container's bash to check whether we have this folder and databases. | docker exec -it 166 bash |
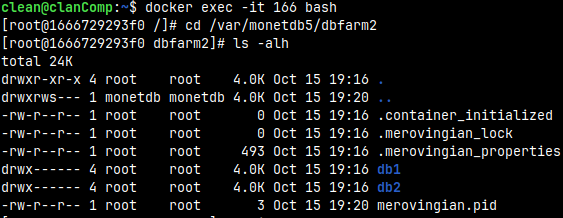 | Inside of the bash I will jump do "dbfarm2" folder. cd /var/monetdb5/dbfarm2Inside this folder we will find databases db1 and db2. ls -alh |
| We don't have explicitly define MDB_FARM_DIR and MDB_CREATE_DBS. They can take the default values. | /var/monetdb5/dbfarm | monetdb |
Volume
We used option that will create volume. Volume is folder on the host system that is mounted into file system of the container. -v data-vol:/var/monetdb5/dbfarm2 |  |
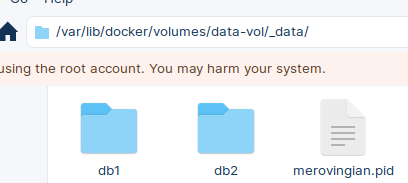 | Volumes can be found on the host system at the location:/var/lib/docker/volumesWe can open this folder on our host computer, and inside of it we will find our databases. The purpose of the volumes is to provide data persistence. If our container is deleted, everything inside of it will be deleted. But this will not happen if the data is on the host computer and is only mounted to container. |
If we want the data to be safe and persistent, we should use volumes.
MDB_SNAPSHOT_DIR, MDB_SNAPSHOT_COMPRESSION and MDB_LOGFILE
We set MDB_LOGFILE to be "/logfile". That is where is MonetDB log:cat /logfile |  |
By default, logfile will be placed inside of the DBfarm, and will have a name "merovingian.log".
We have set snapshot options:-e MDB_SNAPSHOT_DIR=/snapshot | I will make a snapshot with the default settings:monetdb snapshot create db1 |
MonetDB will try but will fail because "/snapshot" directory doesn't exist. We must create it. |  |
mkdir /snapshot Snapshot will be created with the assigned compression " bz2". | 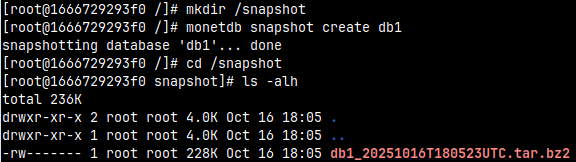 |
Snapshots cannot be created if we don't provide snapshots environs. It would be wise to place snapshots inside of the volume to preserve them.
MDB_FARM_PROPERTIES and MDB_DB_PROPERTIES
With MDB_FARM_PROPERTIES environs we set two DBfarm properties. monetdbd get all /var/monetdb5/dbfarm2 | egrep 'exittimeout|keepalive' |
 |
Possible properties are explained inside of this blog post "link". We cannot set properties "listenaddr, control and passphrase". "Listenaddr" is always set to "all". "Passphrase" is set by the environ MDB_DAEMON_PASS. If we set MDB_DAEMON_PASS, then "control" will be set to true.
If I try to read database properties with "monetdb get all db1", I am getting an error "incomplete response from monetdb". I don't know why this is happening. We are also kicked out from the bash. This is a bug. |  |
Alternatively, we can read from the system function "env()". I will login again into bash and then into mclient.docker exec -it 166 bash In the " env()" table, we can see that the values of the "nthreads" and "ncopyinthreads" properties are set. | 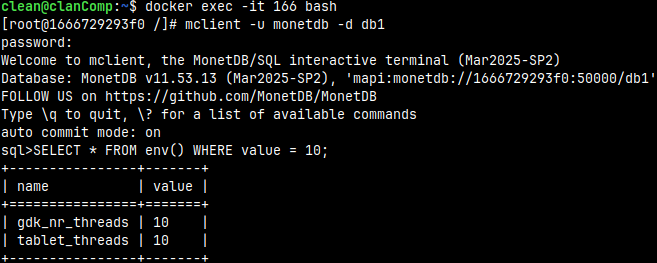 |
Possible properties for a database are explained in this blog post "link".
MDB_DB_ADMIN_PASS and MDB_DAEMON_PASS
MDB_DB_ADMIN_PASS is a mandatory environ. We must set it in order to run MonetDB container.
MDB_DAEMON_PASS is a password for remote Monetdbd control. Remote control of a daemon is explained in the blog post "link". In the context of the containers, this password will allow us to control the daemon in the container from the host operating system.
I will run this command from the host OS to control monetdbd daemon inside of the container. monetdb -h localhost -P daemonPass create db3 |  |
For this to work we need to have some conditions fulfilled on the host operational system:
– We must have MonetDB installed on the host computer.
– DBfarm must be started. Without that we cannot use "monetdb" command.
– DBfarm on the host computer must use port number different than the port number of the MonetDB inside of the container.
 | monetdbd get port /home/clean/DBfarm1Host computer has Monetdbd on the port 50.0001. |
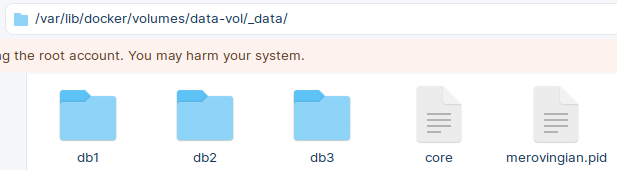 | On the host computer we can visit "volume" folder. Inside of it we will see that the new database "db3" has been created. |
How to Stop and Start Container?
We can stop the container with command:docker stop 16667 docker ps -a |  |
We can start the container with the command:docker start 16667 docker ps |  |
Clean Up
Deleting Images and Containers
I will now delete everything we have done. First, I will stop and delete container. docker stop 16667 docker rm 16667 | 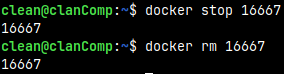 |
We can also delete the image:docker images docker rmi 9f2e | 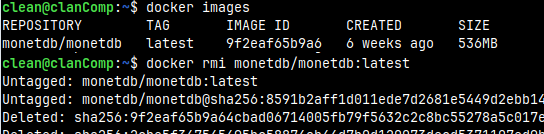 |
Removing Docker from Your System
Deleting Docker includes these steps:
We will first stop docker services. sudo systemctl stop docker.service |  |
We can now uninstall all parts of the docker: sudo apt purge -y docker-ce docker-ce-cli containerd.io docker-buildx-plugin docker-compose-plugin |
 |
In the next step, we will remove docker repository and GPG key. sudo rm -f /etc/apt/sources.list.d/docker.list |
We can update the list of available packages.sudo apt update |
We will remove orphaned dependencies. sudo apt autoremove -y |  |
We can also remove all the remaining docker files. sudo rm -rf /var/lib/docker |  |
We will delete docker user group. sudo groupdel docker |
Now, we can conclude that docker is deleted: docker --version |